Troubleshooting Guide for Go To Market and Contract Setup activities
The following is a list of topics that will guide you out of trouble when you are creating you RFQs and Contracts:
Why can't I add approvers to a Project Approver List?
How do I fix the Project Title or other settings if I've made a mistake?
What do I do if I've activated the wrong workflow and started the tasks?
Why can't I promote the RFQ or Contract to the next task?
How do I cancel my Approval Request?
Is there are faster way to set up the RFQ Envelopes?
The Publish RFQ button is not available
The Activate button is not available in the Attach and Activate task
P2i says I cannot activate my Contract
I cannot edit the Additional information
I moved the Contract in the workflow and now I can't activate it
Why can't I add approvers to a Project Approver List?
Only the Project Owner can update the Project Approver Lists in P2i.
Any P2i Senior User, P2i Senior Director, P2i Procurement Authority, P2i Procurement Services, P2i Regional Manager, or P2i Super User can make themselves the Project Owner if they are a member of the Project Team.
To access the Project Approver List:
-
Open the project and change the Project Owner to yourself.
-
Open the Project Approver List and update your approvers.
-
Change the Project Owner back to the original owner if required.
Watch the short video below to see how it's done.
How do I fix the Project Title or other settings if I've made a mistake?
Any P2i Senior User, P2i Senior Director, P2i Procurement Authority, P2i Procurement Services, P2i Regional Manager, P2i Contract Manager, P2i Contract Officer, or P2i Super User can edit the Project details as long as they are on the Project Team.
To edit the Project settings:
-
Open the project, click the Details tab and select Settings.
-
Click the Edit button.
-
Make your changes to the Title, Reference, Internal Description or Categories, click Save and then Confirm.
Watch the short video below to see how it's done.
What do I do if I've activated the wrong workflow and started the tasks.
There are six (6) workflows in a P2i Project: GO-TO-MARKET (RFI), GO-TO-MARKET (RFQ), CONTRACT VARIATION, CONTRACT RENEWAL, CONTRACT SET-UP, and CONTRACT CLOSE OUT.
CONTRACT SET-UP, and CONTRACT CLOSE OUT are already activated, however you will need to activate one of the other workflows if you want to run an RFI, RFQ, Contract Variation or Contract Renewal.
To deactivate a workflow that you've activated by mistake:
-
Open each task with a green chevron and click Stop Task. You will need to click Confirm when prompted.
-
Click the Deactivate button.
- Click the Activate button for the correct workflow and click Do Not Start Tasks.
Watch the short video below to see how it's done.
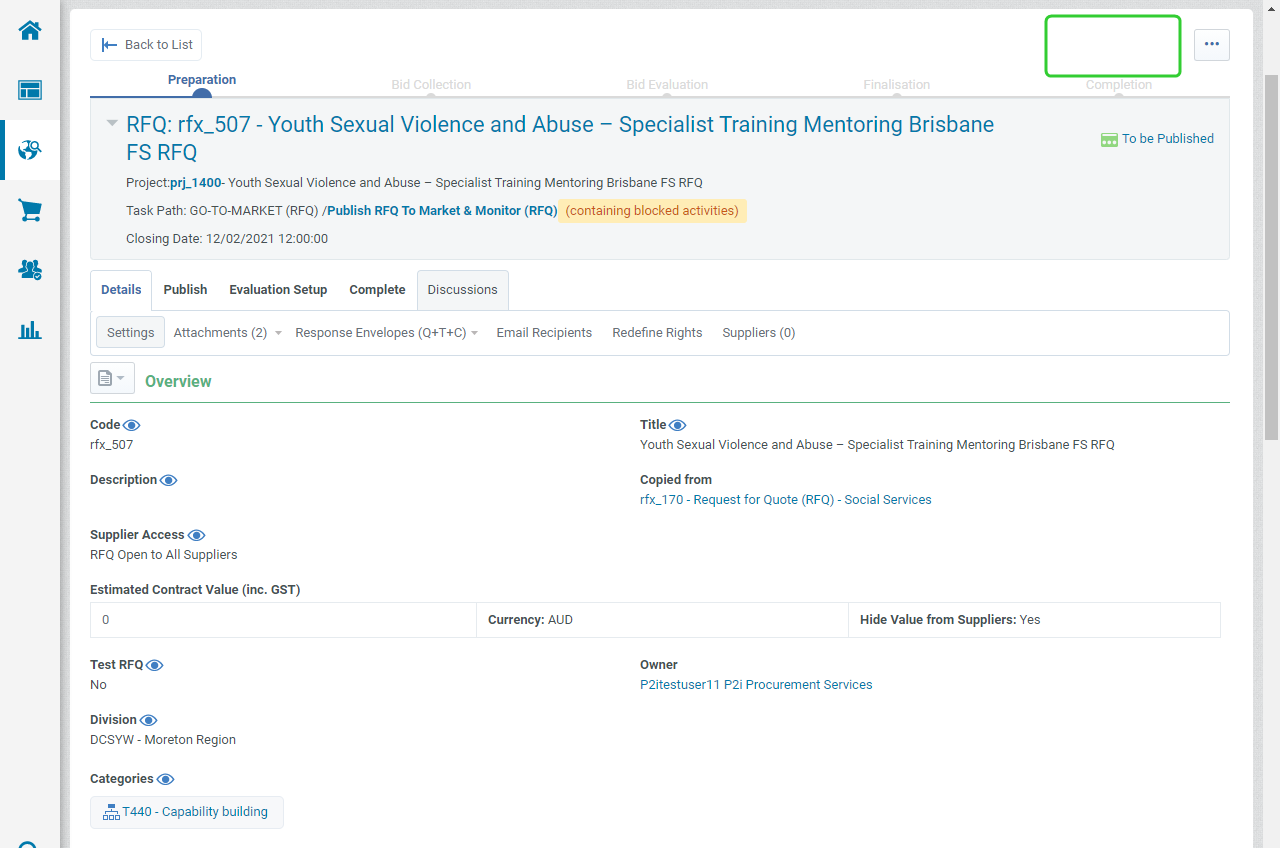
Why can't I promote the RFQ or Contract to the next task?
There could be a couple of issues with the workflow, but the most likely problem is that you have completed a task that has an RFQ or Contract attached, but you didn't Promote the RFQ or Contract to the next task.
In this example, both the Publish RFQ to Market & Monitor (RFQ) and Screen and Evaluate Suppliers (RFQ) tasks were completed, but the object were not promoted. When clicking the Promote Objects button, there is no option to promote to the Screen and Evaluate Suppliers (RFQ) task because it has been completed.

To fix this workflow:
-
Open the task that is Running and click Stop Task. Confirm when prompted.
-
Open the task that you want to promote the objects too, that has been completed and click Start Task. Confirm when prompted.
-
Click the Promote Objects button and promote the objects to the correct task.
Warning Only select the Close procurement task if the procurement is no longer going ahead.
Watch the short video to see how it's done.
How do I cancel my Approval Request?
You can easily recall your approval request if you have sent the RFQ or Contract off for approval. Remember that while the task status is Awaiting Approval, you cannot make any changes to the RFQ or Contract.
To recall an approval request:
-
Open the task that is waiting approval
-
Click the Approvals tab.
-
Click the ... button and select Recall Approval.
-
Click Confirm.
Watch the short video below to see how it's done.
Is there are faster way to set up the RFQ Envelopes?
Create a Response Configuration file which you can import into your RFQ and adjust.
To create and user a response configuration file:
-
Open an RFQ that has the Qualification, Technical and Commercial Envelopes set to the basic structure you want to work from.
-
Export the Configuration file.
-
Create a new procurement project and RFQ.
-
Delete the contents of the Qualification, Commercial and Technical Envelopes.
-
Import the response configuration file.
Watch the video below to see how it's done.
The Publish RFQ button is not available
Only P2i Procurement Services or a P2i Procurement Authority can publish the RFQ if they have been added to the Project Team.
Contact the project's sourcing lead: P2i Senior User or P2i Regional Manager to make sure you have been added to the Project Team.
To check the Project Team members and publish the RFQ once added:
-
Click the link to the Project under the RFQ Title.
-
Click the Details tab and Project Team.
-
Add the Procurement Services member to the Project Team (P2i Senior User or P2i Regional Manager)
-
Open the RFQ and click Publish (P2i Procurement Services)
Watch the short video below to see how it's done.
The Activate button is not available in the Attach and Activate task
The P2i Contract Officer, P2i Regional Manager or P2i Contract Officer can activate the contract if they have been added to the Project Team. The P2i Contract Officer must be made the Contract Manager so that they can complete the contract setup activities in the Contract Management Hub.
Contact the project's sourcing lead: P2i Senior User or P2i Regional Manager to make sure you have been added to the Project Team.
To check the Project Team members and activate the Contract once added:
-
Click the link to the Project under the Contract Title.
-
Click the Details tab and select Project Team.
-
Add the P2i Contract Officer to the Project Team (P2i Senior User or P2i Regional Manager)
-
Open the Contract and click Activate (P2i Contract Officer)
Watch the short video below to see how it's done.
P2i says I cannot activate my Contract
There are two items required before the contract can be activated. First, the P2i Contract Officer must enter the Execution Date (the latest date that both parties sign the contract (currently via a wet signature). Second, the signed version of the Contract must be Set as Approved Master Document. The P2i Contract Officer must be made the Contract Manager in the Contract to complete both of these tasks.
To add the Execution Date and/or Set as Approved Master Document:
-
Open the contract and click Contents Management and then select Additional Information.
-
Click the Edit button.
-
Enter the Execution Date and click Save.
-
Click Contents Management and select Master Document (Proposal Approved).
-
Click Confirm This Proposal As Signed (Set As Approved Master Document).
-
Click Activate and then click Confirm.
Watch the short video below to see how it's done.
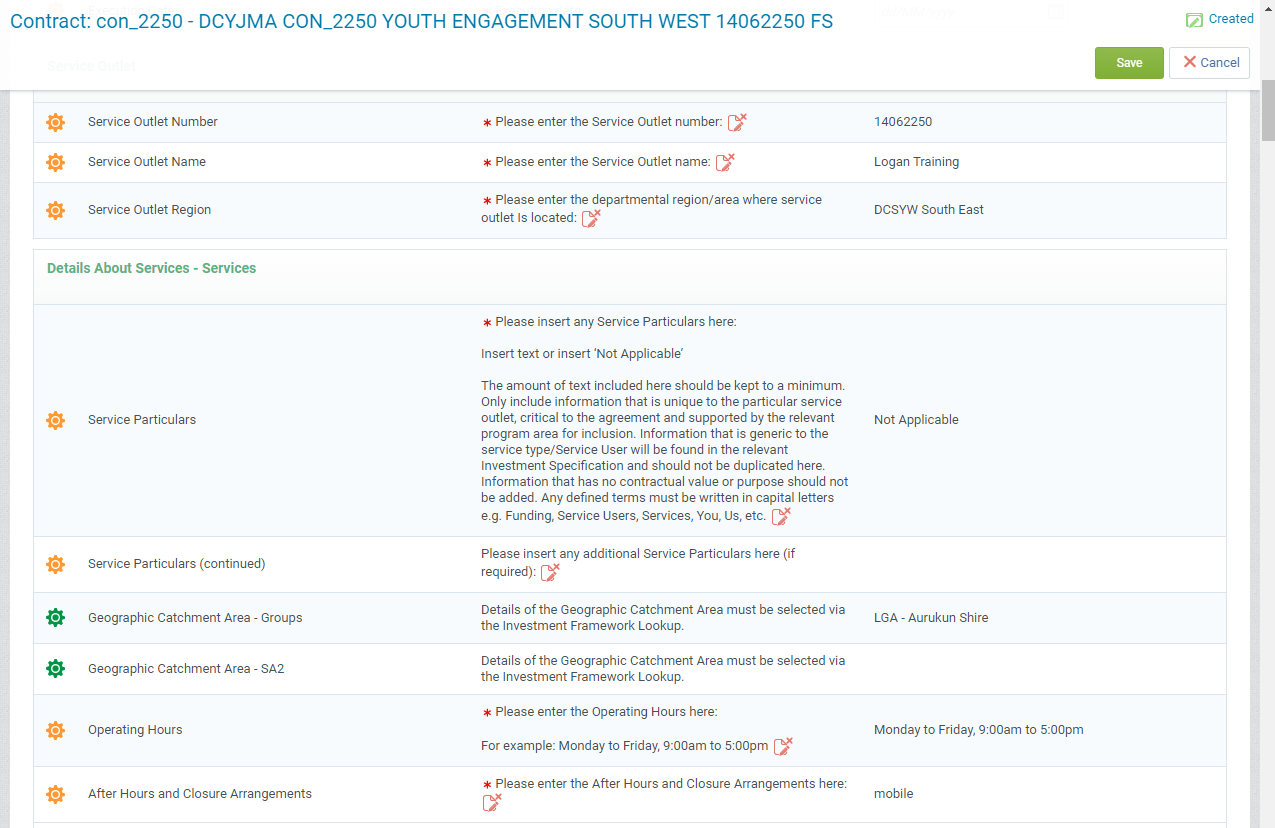
I cannot edit the Additional information
To create a draft of the contract in Word, you must create a new proposal. When that happens P2i locks the fields that are generated in the draft version of the contract. This stops anyone from changing the contract while it being reviewed by the Supplier. If there any changes required to Additional Information following that review, you will need to create a new proposal.
To unlock the Additional Information and make changes to the Contract:
-
Open the contract and click Contents Management and then select Master Document (Proposal Approved).
-
Click Create New Proposal.
-
Select From the enabled Library Clause from Select Proposal Origin and click Create New Proposal.
-
Click Ok to clear the message.
-
Click Additional Information and then Edit.
-
Make any required changes and click Save.
-
Click Master Document (To Be Submitted) and click Confirm Final Approval.
-
Click Approve.
Watch the short video below to see how it's done.
I moved the Contract in the workflow and now I can't activate it
A contract can only be activated when it is in the Attach and Activate task in the workflow. If you complete this task before activating the contract you need to move the contract back to the Attach and Activate task.
Any member of the Project Team can do this.
To return the contract back to the Attach and Activate task:
-
Select the task where the contract and any other objects are sitting.
-
Click the ... button and select Move Objects.
-
Select all objects and click Confirm.
-
Click Select Project.
-
Find a Project and click Select. (It is recommended that you have a dummy project setup for this purpose)
-
Select a Target Task for each object and click Move.
-
Click Confirm.
-
Click the Stop Task button.
-
Click Confirm.
-
Click Confirm.
-
Click Back to List.
-
Repeat the process to stop any remaining tasks.
-
Open any completed tasks below the Attach and Activate task.
-
Click the Return Task to Running button and then once they are running, click the Stop Task button.
-
Open the Attach and Activate task and click Return Task to Running.
-
Open the project that you moved the contract to and move the contract and any other objects back to the Attach and Activate task.
-
Activate the contract.
Watch the video below to see how it's done.